
Altium sắp cho ra mắt Altium Designer 19 với nhiều tính năng mới.
Xem những tính năng mới tại đây: http://pcbviet.com/nhung-tinh-nang-moi-tren-altium-designer-19/
Tuân thủ DMCA chúng tôi rất tiếc buộc phải ngừng chia sẻ những phần mềm có giới hạn. Vui lòng tham khảo cách cài đặt ở bài viết dưới đây. Rất xin lỗi vì sự bất tiện này.
Hướng dẫn cài đặt Altium Designer
Running the Installer
Double-click the AltiumDesignerSetup<Version>.exe file. The Altium Designer Installer welcome page will appear.

Initial welcome page for the Altium Designer Installer.
The installer itself is wizard-based, providing a set of progressive (and intuitive) pages that collectively gather the information to effectively install the version of the software, and its initial feature set, as you require.
Click Next to continue. The following sections provide a summary of the various pages you will encounter.
License Agreement
This page of the Installer presents you with the Altium End-User License Agreement (EULA).

Read and accept Altium’s End-User License Agreement.
Before you can continue with the installation of the software, you must read through, and accept, the terms of this agreement. The agreement can be viewed in different languages, including English (the default), German, Chinese and Japanese.
Clicking the Advanced button will access an Advanced Settings pop-up window. From here, you are able to specify proxy-settings, if applicable. Click OK to effect any changes and return to the License Agreement page.
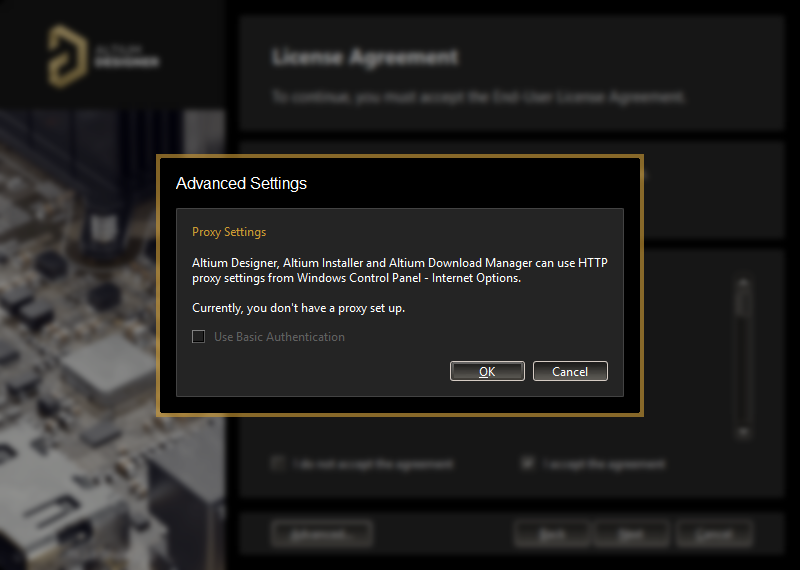
Specify the use of basic authentication using proxy settings, as part of advanced options for the install.
With the EULA read, continue with the install by checking the I accept the agreement box and clicking the Next button.
Installation Mode
If you already have Altium Designer installed, and are running the installer for a subsequent point release within the same version stream (e.g. installing Altium Designer 19.0.x, and Altium Designer 19.0.x-1 is already installed), an additional page of the Altium Designer Installer wizard will be available – Installation Mode. This page gives you the choice of either updating an existing version instance of Altium Designer, or installing as a separate new version instance. Choose the New installation option to maintain separate version instances of the software on the same computer. Alternatively, choose the Update existing version option, then use the drop-down field to select the specific instance of the software you wish to update.

If you already have a previous installation of Altium Designer within the same version stream, you can choose to update that version.
Or, simply install as a separate unique instance.
With your choice of installation mode made, click Next to proceed.
Account Log-In
You will now be presented with an Account Log In pop-up window. This simply means logging in to your Altium Account – to which your valid license is associated – using your AltiumLive Credentials. The reason for this is two-fold:
- Firstly, it verifies your identity and that installation of the software is valid, as determined by your account and licensing.
- Secondly, it provides secure access to the Altium Cloud Repository in which the installation files reside – the files that are required to be downloaded before the software can be ultimately installed on the PC.

Log in to your account using your AltiumLive Credentials.
Select Design Functionality
This next page of the Installer allows you to specify which features are installed initially. The PCB Design option provides the base software and core technologies required to perform PCB design. It is always installed and cannot be deselected. Use the remaining options to tailor the install to suit your needs. This will also have an impact on the initial installation time too!
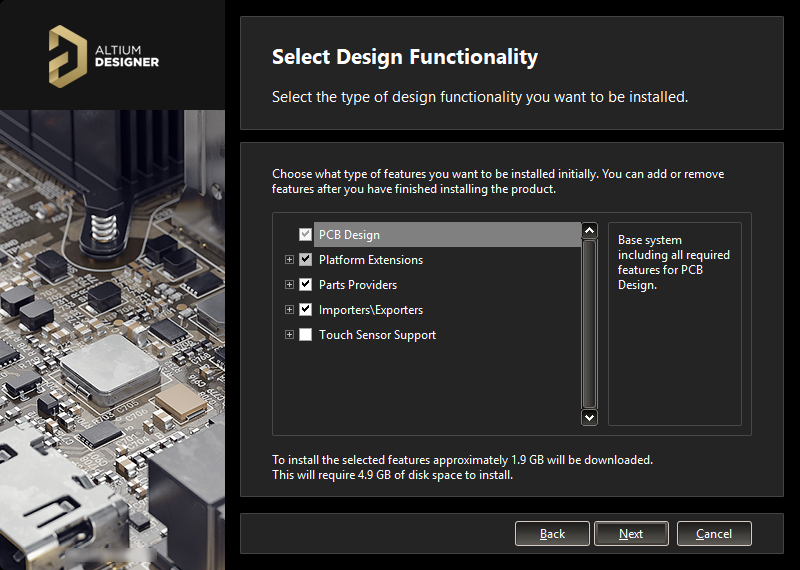
What initial functionality would you like in your installation of Altium Designer? – The choice is yours!
Simply click to enable the functionality you require. As you select and deselect functionality, text at the bottom of the page dynamically updates to reflect the size of the download involved and how this translates to required disk space, once those downloaded files are installed.
Remember, no matter what decision you take at initial install, you can add or remove features and functionality at any stage after installation. This puts you in the driving seat as it were, to fully customize your installation in-line with your, possibly ever-changing, design needs.
After defining what functionality you’d like, click Next to proceed.
Destination Folders
This next page of the Installer allows you to specify the destination folders for the install, in terms of both the Program Files for the software and the Shared Documents that are accessed and used by the software.
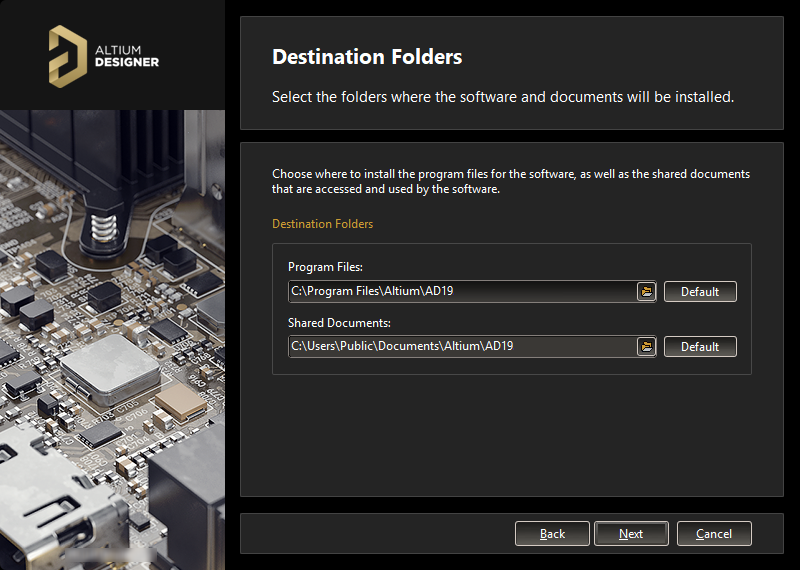
Specify where the software and associated documents are to be installed.
These locations become especially important when installing multiple instances of Altium Designer. If one or both of these destinations is not currently an empty folder (i.e. devoid of content) you will be prevented from proceeding with the installation until you specify alternate (and empty) destination(s).
The default destinations (Windows 7 SP1 and above) are:
Program Files
C:\Program Files\Altium\AD19
Shared Documents
C:\Users\Public\Documents\Altium\AD19
To specify alternate locations, simply type the location directly into the applicable field, or click the folder icon at the right of a field and browse for the required destination folder.
Once the install locations are specified, click Next to continue.
Ready To Install
The Installer now has all the information it requires to proceed with the installation. If you need to change anything, click the Back button. If you want to cancel out of the install, click Cancel.

Ready to begin the install!
To go ahead and proceed with the installation, click Next.
Installing Altium Designer
The page will change from Ready to Install to Installing Altium Designer and the installation will proceed, with the required files first being downloaded (from the secure cloud-based repository). Progress of this download is displayed within the Installer itself.
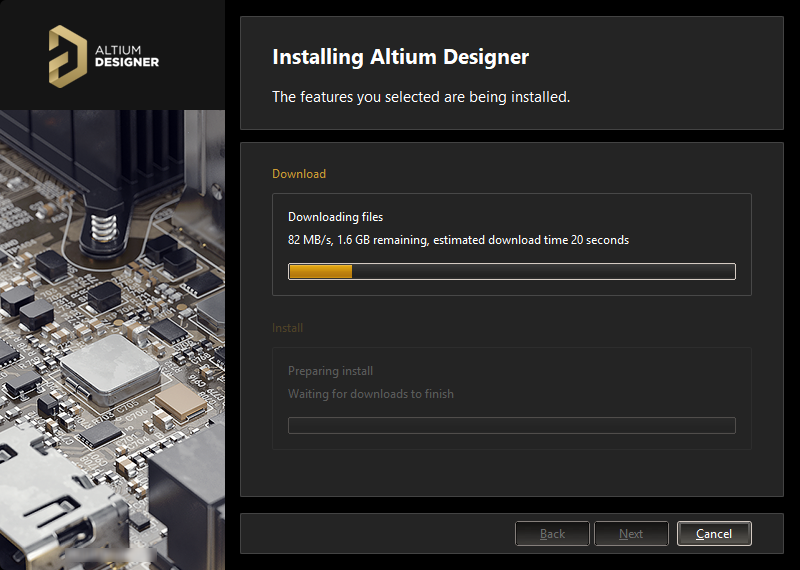
Installation commences by downloading the required set of install files.
Once the download of files is complete, they will be installed, again with progress displayed in the Installer.
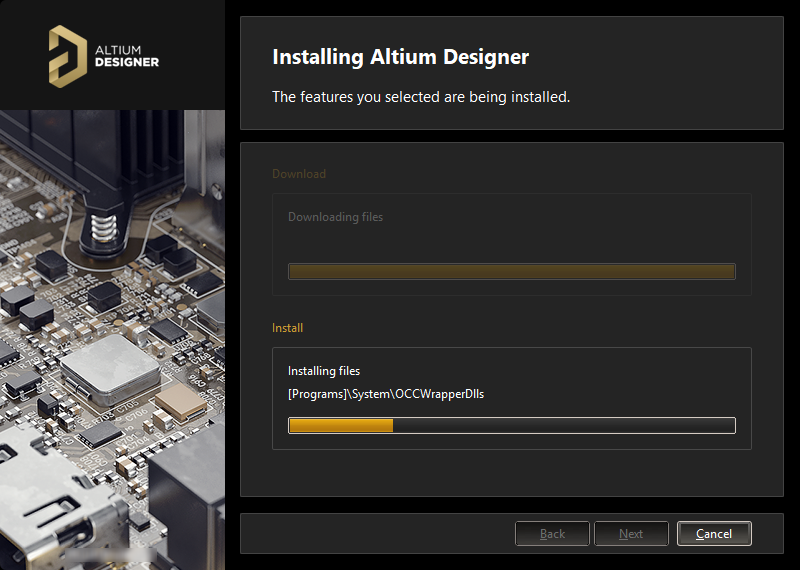
After the download is complete, the software is then installed.
Installation Complete
When the installation itself completes, you have reached the end of the Installer wizard.
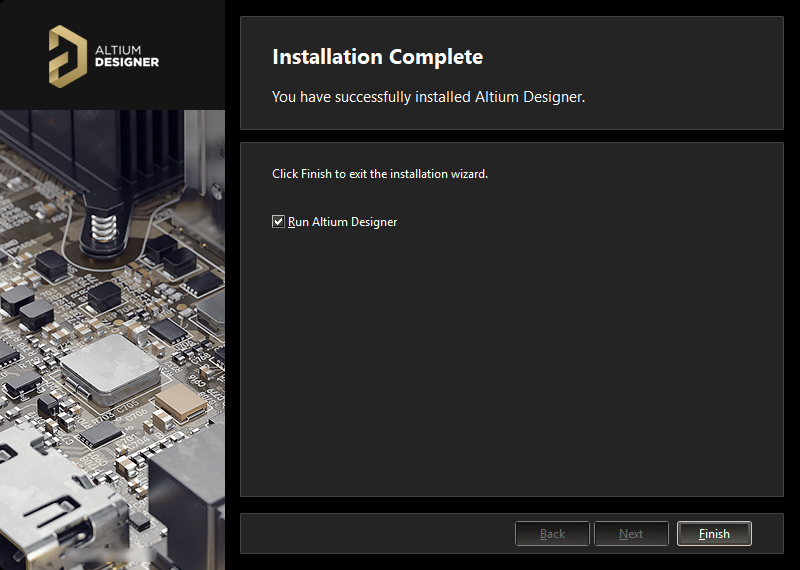
That’s it, installation is complete!
Cài đặt bình thường sau đó copy shfolder.dll trong thư mục Altium Designer Beta 19.0.4\Crack\Licenses vào C:\Program Files\Altium\AD19
Bước 2: Mở Altium Designer 19 rồi add license file: Altium Designer License 2A92-AC3A R10.alf
Xem thêm thông tin về Altium Designer mới nhất: https://www.altium.com/altium-designer/
Read more about Altium designer design tips here: https://pcbviet.com/category/altium-designer/
download ở đâu??????